Shopify’s Section Rendering API is becoming increasingly important for modern theme development. It lets you update specific sections of a page without a full reload, creating a smoother, more dynamic experience.
Think of it like the infinite scroll on Instagram or Facebook, where content loads seamlessly as you interact.
In Shopify, this could mean updating the cart icon in real time when a customer adds a product or dynamically fetching product data for a product-comparison section.
Lets have a look at:
- What the Section Rendering API is and why it’s useful.
- How it works behind the scenes with network requests.
- How you can start get started in using the API
- Real-world examples of its application
So, grab a coffee and let’s dive right in 🔥
What is Shopify’s Section Rendering API?
In a nutshell, the Section Rendering API lets you update specific sections on a Shopify store without refreshing the entire page.
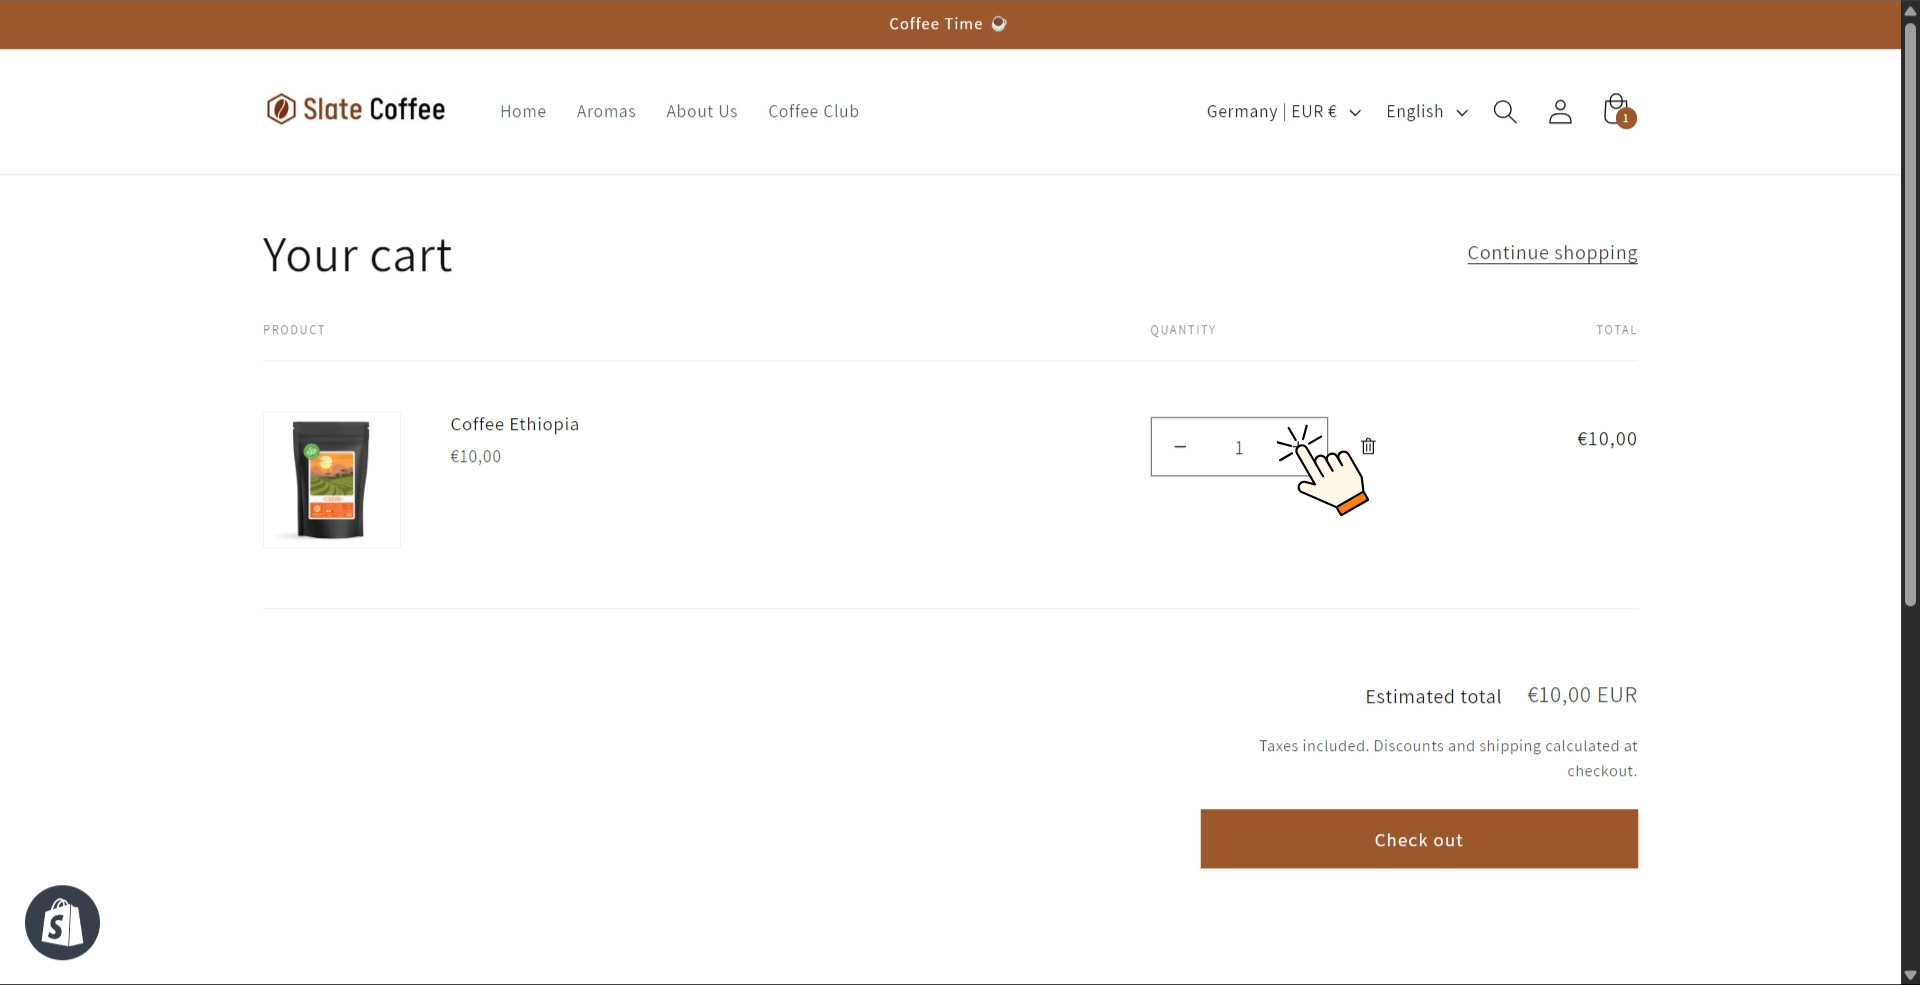
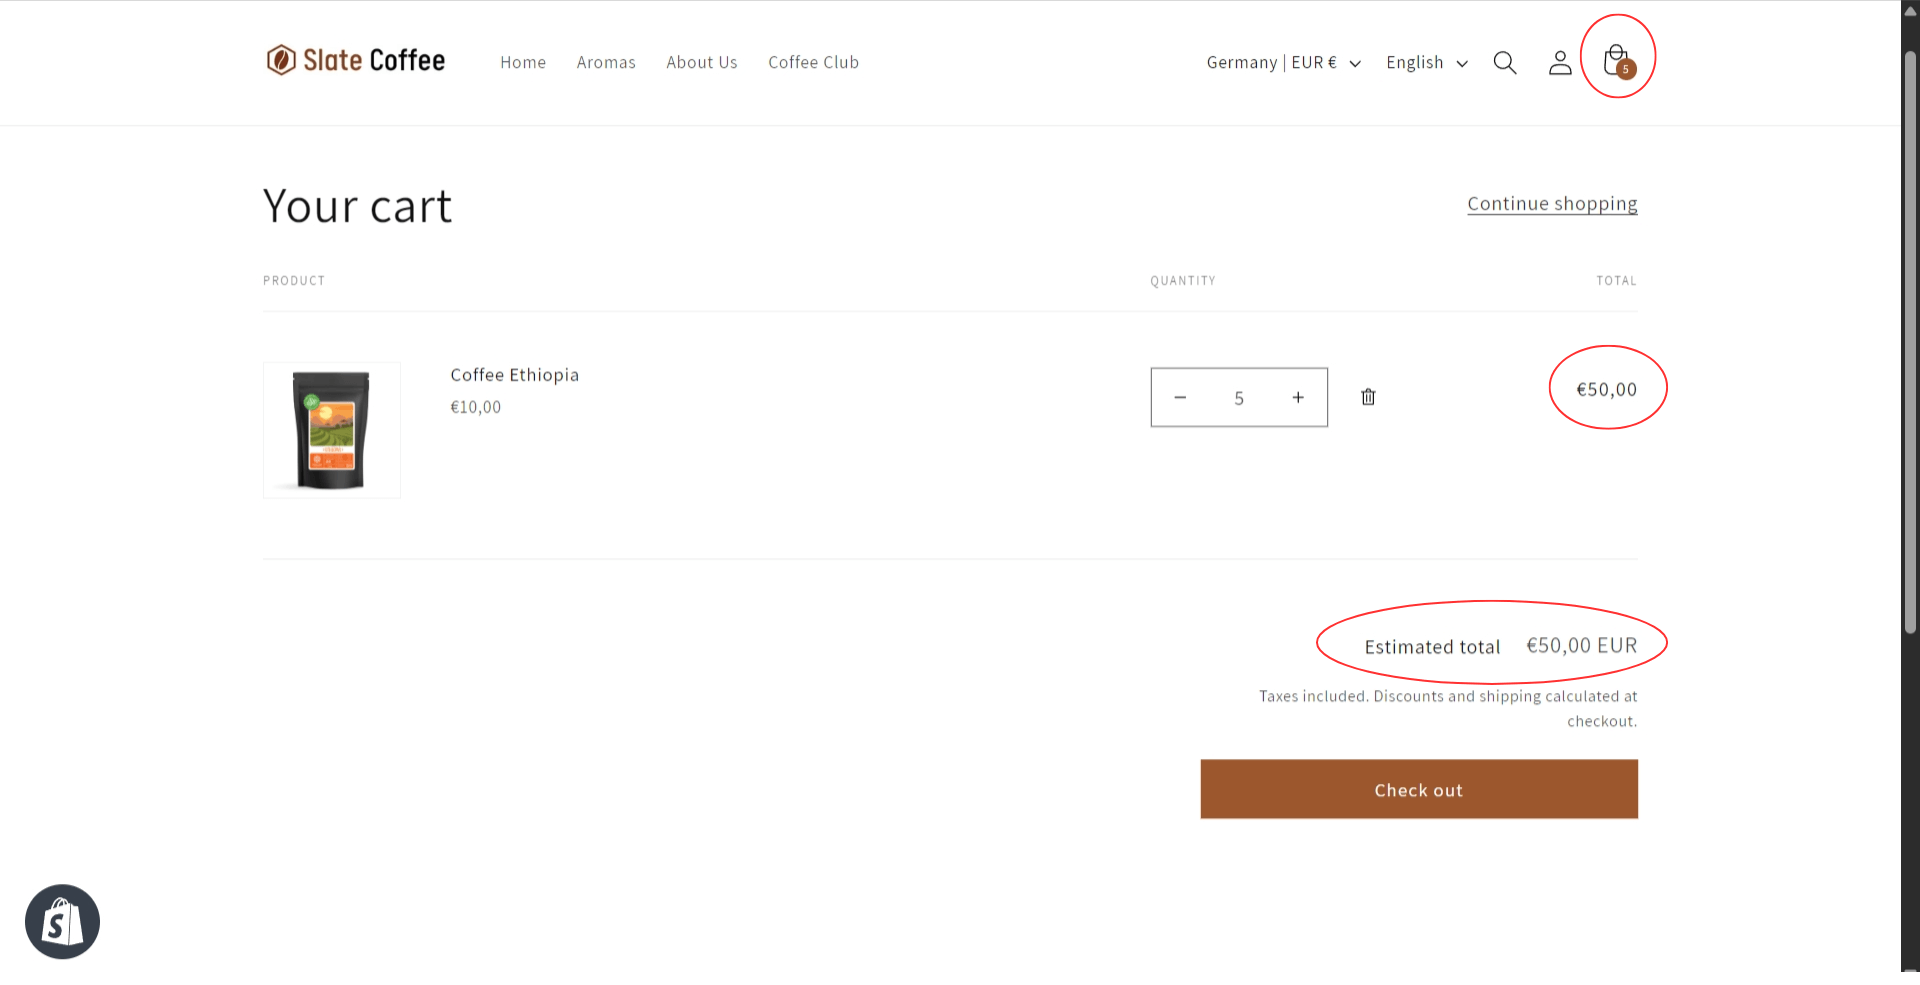
For example, let’s take Shopify’s default Dawn theme. When you update the quantity of an item in your cart, you’ll notice a few things change instantly:
the cart total updates, the number of items in the cart adjusts, and even the cart icon in the header reflects the new count. And all of that happens without a full page reload.
Understanding The Section Rendering API Behind The Scenes
To understand what’s going on, let’s open Chrome Developer Tools (right-click on the page > Inspect) and head over to the Network tab. This is where all the magic happens.
- Filter for Fetch and XHR Requests – This helps us see only the relevant requests.
- Change the Cart Quantity – Say we update an item from 5 to 8.
- Observe the Request – A request is sent to cart/change, which makes sense because we’re modifying the cart.
- Look at the Payload – This shows the data being sent. We’ll see things like:
- The cart item we’re modifying
- The new quantity (5 in our case)
- A field called sections, which is where the Section Rendering API kicks in.
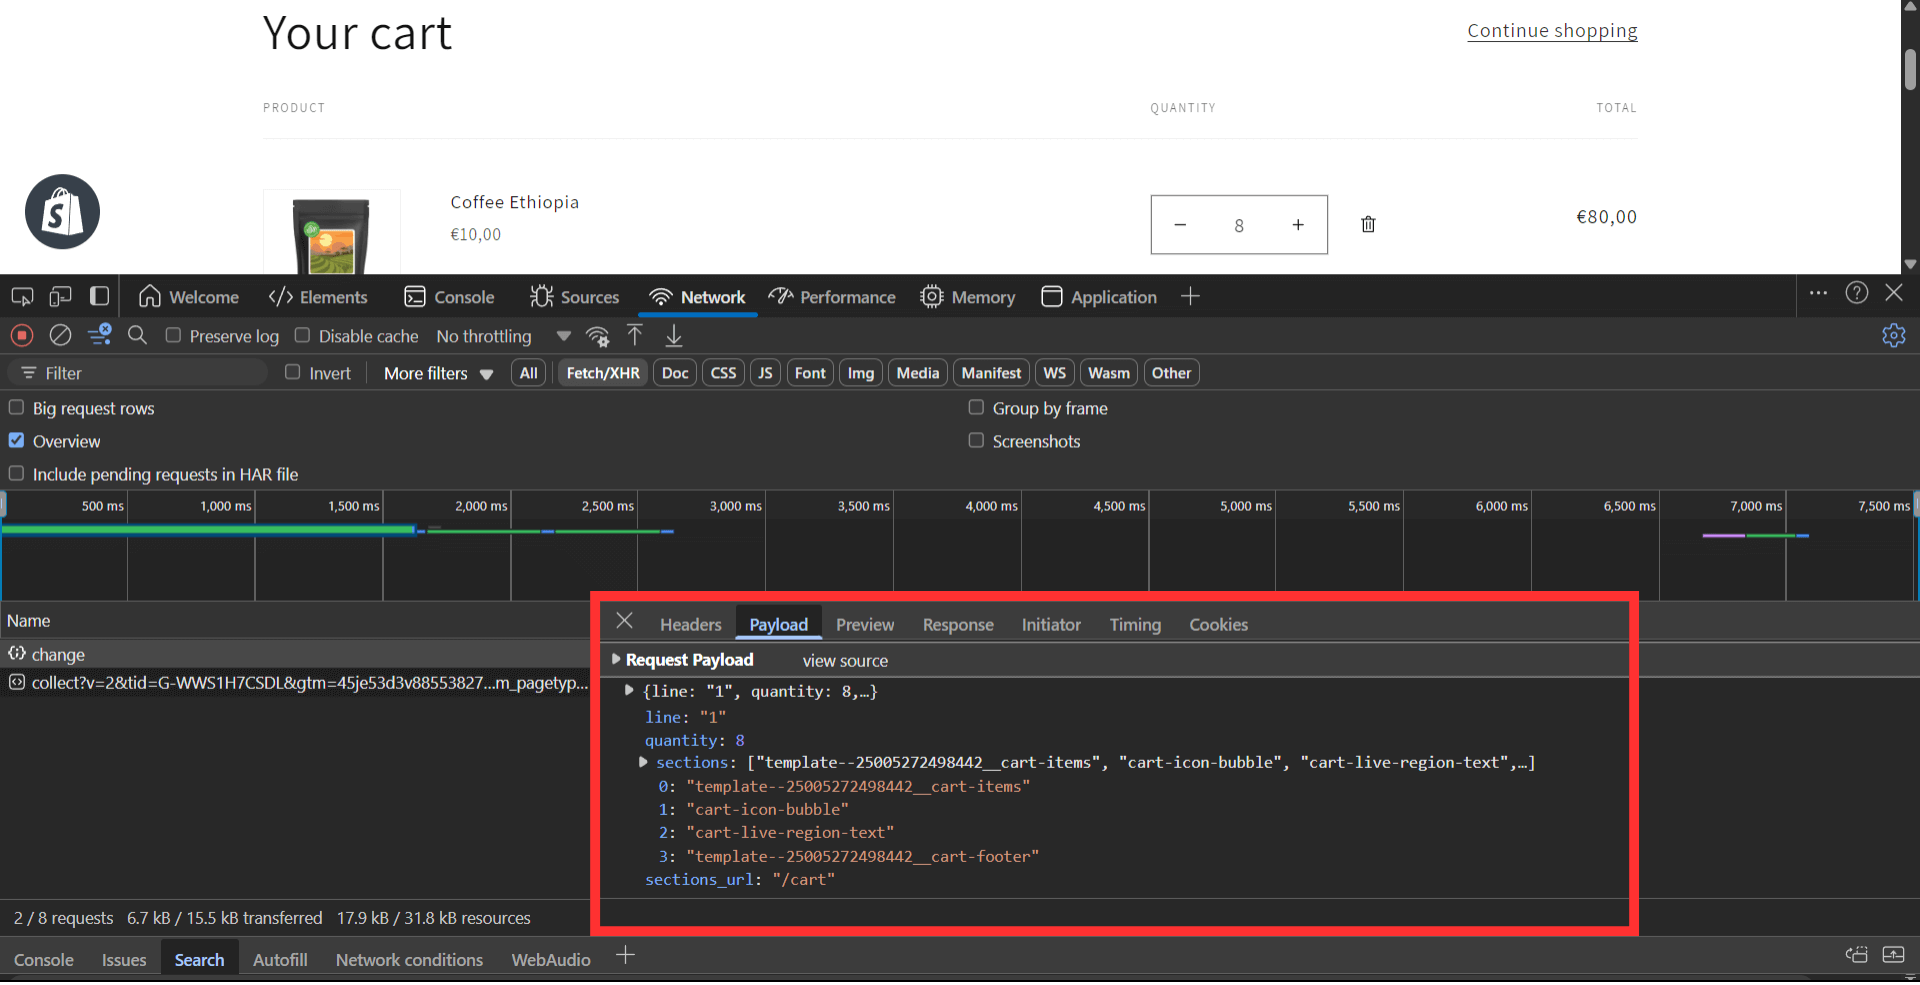
The sections array lists all the different sections that need updating. In our example, it included:
- The cart items
- The cart icon bubble
- The live region text
- The cart footer
Getting the Response
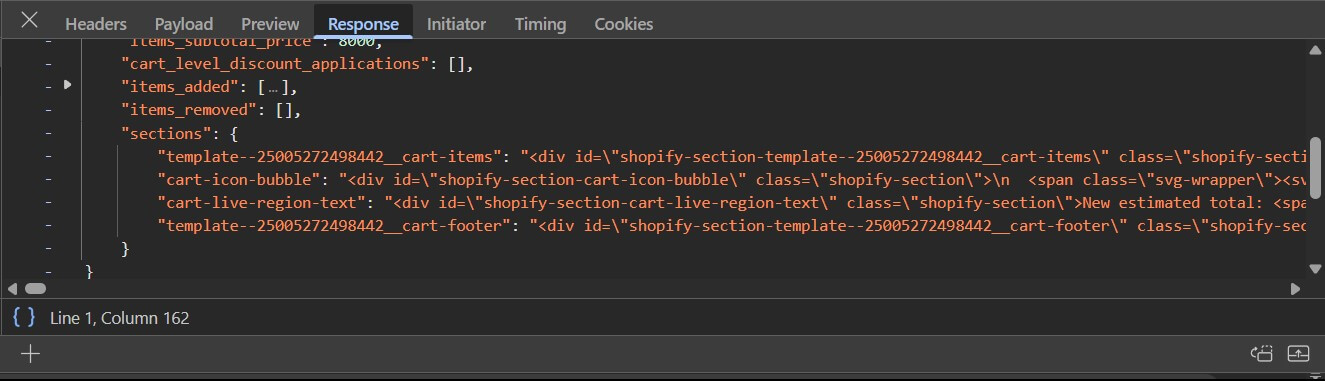
Once the request is sent, the server then responds with structured data, including HTML for each updated section.
This is found in the Response tab.
This means we can take that new HTML and replace the existing elements on the page, effectively updating the page.
Recap
In a nutshell, we can use the Section Rendering API:
- To request an update for specific sections
- Receive the updated HTML from Shopify.
- Swap out the old elements with the new ones.
How To Start Using the Section Rendering API
In the simplest way possible, here is how you can get started with using the Section Rendering API:
- Open Developer Tools and go to the Console tab.
- Make the Fetch Request:
To fetch a single section, we’ll use the code below:
fetch('/?section_id=section-id');However, if you want multiple sections, use sections (plural) instead and separate each section-id with a comma:
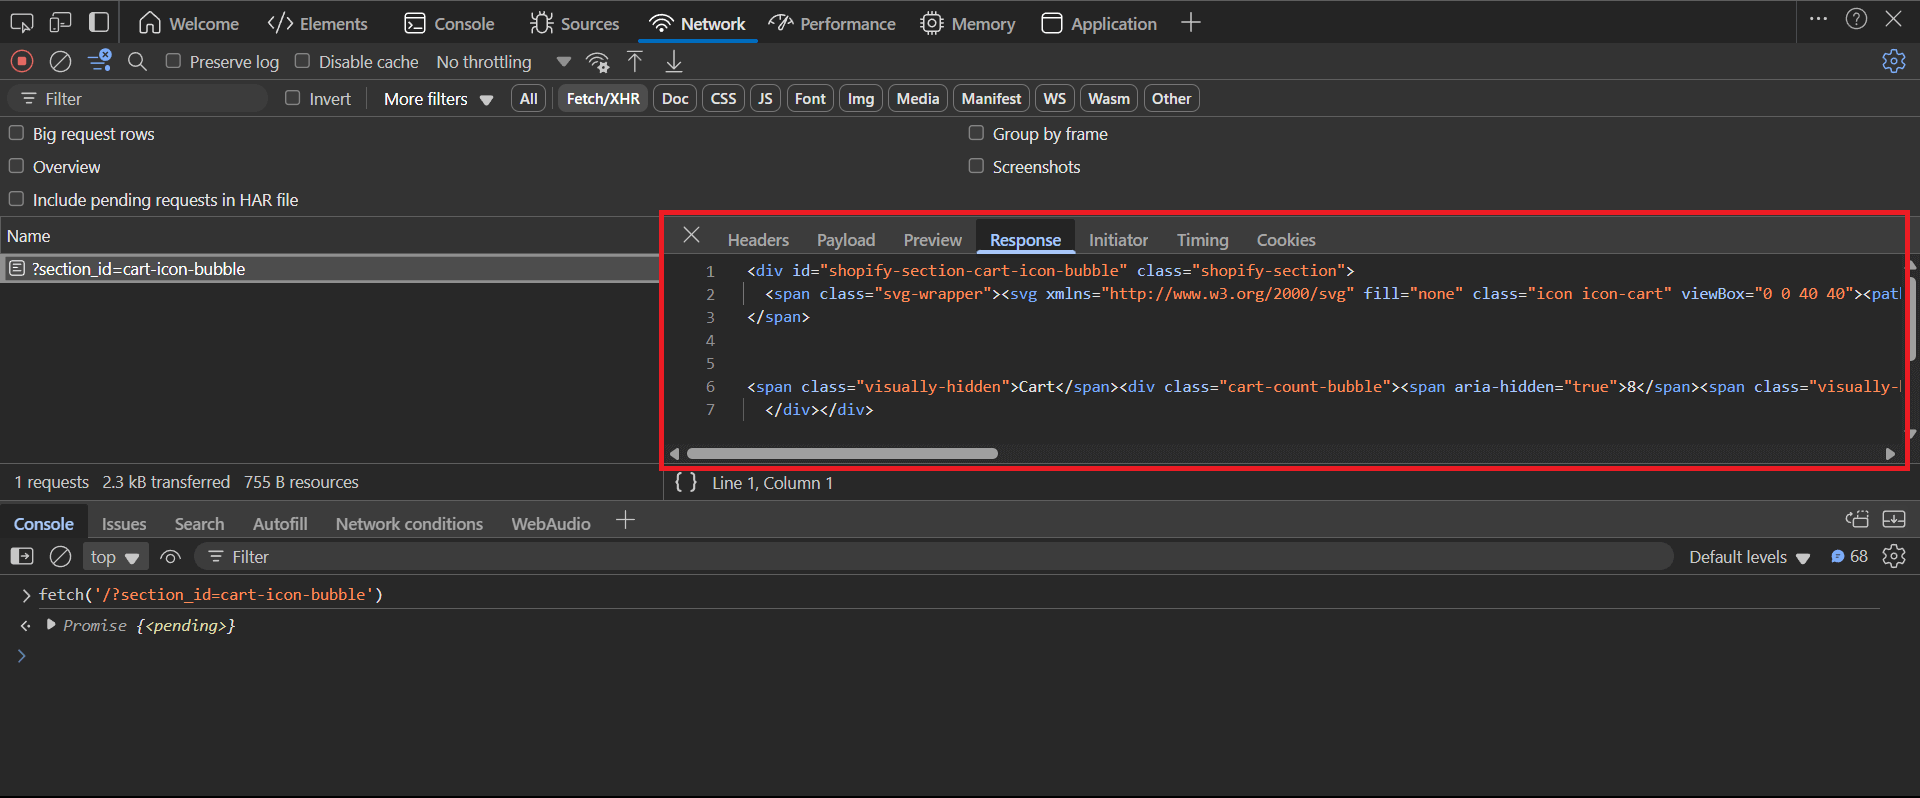
fetch('/?sections=section-id-1,section-id-2');For example, in the Dawn theme, in order to request the cart-icon-bubble section, we use the code below and hit enter:
fetch('/?section_id=cart-icon-bubble');- Check the Response:
Head over to the network tab and you’ll find the request we just made. Clicking on this request, we see the information related to the request. And in the response tab, we see the HTML of the requested section.
- Updating our page
Using this response, we can then replace the HTML of our old section with the new one.
And that’s it! That is how you can get started in using the Section Rendering API.
What makes the Section Rendering API Useful?
Shopify’s Liquid language only works before a page loads. It’s a server-side templating language, which means that all Liquid code is executed on the server side and no Liquid code ever reaches the browser.
On top of that, you won’t be able to use Liquid to react to user interactions, such as updating the cart icon whenever a customer adds a product to cart.
JavaScript, on the other hand, runs after the page loads and is perfect for responding to user actions, like button clicks. However, JavaScript alone can’t re-run Liquid code to update server-side data though.
This is where the Section Rendering API comes in. It bridges the gap by allowing us to re-execute Liquid code dynamically after the page has loaded—something that wasn’t possible before.
With this API, we can update content in real time, making Shopify themes far more interactive and efficient.
What are some real-world use cases of the Section Rendering API?
Although the sky is the limit here, here are some real-world examples of where you can use the Section Rendering API:
- Product Comparisons – Fetch and display different product details dynamically.
- Variant Selection – Shopify now uses this method for updating product details when selecting different variants.
- Cart Updates – As we saw earlier, it enables real time cart updates without having to reload the page.
Bootcamp
If you want to fast-track your Shopify developer career, this is exactly the kind of stuff we build in the Shopify Developer Bootcamp. We don’t just talk theory—we implement real production-ready features like this step by step. If you’re serious about becoming a paid Shopify developer, this is the fastest path.
Wrapping Up
Alright, I hope that was a solid intro to Shopify’s Section Rendering API!
I hope this gave you a good starting point.
If you also want to see the quick video walkthrough find it down below.
Thanks for reading, happy coding, and I’ll catch you in the next one! ✌️